


EPRO Eddy Current Sensor Operation Manual
Model: PR6423/011-110+CON021 (Axial Vibration Monitoring)
Pre-Operation Checklist
-
Environmental Verification
- Temperature range: -30°C to +120°C (sensor head)5
- Cable length: ≤500m (shielded triaxial cable required)5
- Hazardous area certification: ATEX II 2G Ex ib IIC T4 (with IS barrier)5
-
Hardware Inspection
- Confirm probe markings:
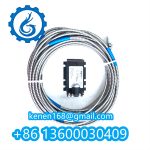
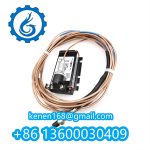
▷ PR6423/011-110 (8mm diameter probe)
▷ CON021 (2-channel preamplifier)4 - Check probe gap voltage: 10V DC ±5% (at 1mm air gap)
- Confirm probe markings:

Measurement Procedure
Step 1: Probe Installation
plaintextCopy Code
1. Mount probe perpendicular to target surface (max 2° deviation)

2. Recommended installation:

   • Threaded: M10×1 with locking nut

   • Flush mount: Use EPRON-12 adapter sleeve

3. Initial gap setting: 1.0mm (calibrate with feeler gauge)
Step 2: Electrical Connection
| Terminal | Function | Specification |
|---|---|---|
| PIN 1 (Red) | +24V DC Power | 18-30V DC, 50mA max4 |
| PIN 2 (Blue) | Signal Output (+) | 0-10V DC (2mA drive)5 |
| PIN 3 (Shld) | Signal Ground | Isolated from chassis1 |
Wiring Notes:
- Use twisted-pair cable with 100% copper shield
- Ground shield at controller end only1
- Maintain ≥15cm separation from power cables

Calibration Sequence
-
Static Calibration
multimeterCopy Codea. Apply 24V power to CON021
b. Measure DC voltage at PIN2:
• 0.5mm gap = 2V ±0.1V
• 2.0mm gap = 8V ±0.2V
-
Dynamic Validation
oscilloscopeCopy Codea. Rotate target at 3000 RPM
b. Verify waveform:
• Peak-to-peak ≥4V (vibration >50µm)
• Noise <0.05V RMS
Diagnostic Indicators
| LED State | Condition | Action |
|---|---|---|
| Green ON | Normal operation | Proceed with monitoring |
| Red Flashing | Probe short-circuit | Check cable resistance (<1Ω)1 |
| Off | Power failure | Verify 24V supply4 |

··········································································································


Reviews
Clear filtersThere are no reviews yet.